[This is part 4 of an ongoing series of posts examining the HTML5 Canvas element. In Part 1 of this series, I introduced Canvas and prepared a template to make further explorations a bit simpler, and also introduced JsFiddle, a neat tool for experimenting with and sharing web code. In Part 2, I demonstrated the ability of Canvas to allow your page background to shine through, and showed you how to render simple shapes on the drawing surface. In Part 3, I showed how to draw paths and text in Canvas.]
Transformations in HTML5 Canvas are surprisingly straightforward, but come with a twist if you’re used to other platforms. For example, in both SVG and Silverlight, transforms are applied by applying additional markup elements or attributes to specific elements or groups of elements. This means that you have pretty fine-grained control of transformations, and can apply them even after a given element has been rendered, by using code to add the necessary attributes.
In Canvas, transformations are applied before you start drawing the path, shape, or text that you want transformed. That’s because what you’re transforming isn’t an element at all…remember that Canvas doesn’t render elements, it renders pixels, and once the pixels are drawn, they’re just part of the canvas.
So what does this mean in practice? Well, probably best to show an example. Here’s some JavaScript that draws a simple shape on our canvas (if you are new to this series, check out Part 1 to see the basic template I use to render all the examples…the code below is just dropped into the renderContent function, which is executed automatically when the page is loaded):
1: context.beginPath();
2: context.fillStyle = "Yellow";
3: context.strokeStyle = "Yellow";
4: context.arc(100,75,50,0.25*Math.PI,1.75*Math.PI);
5: context.lineTo(100, 75);
6: context.stroke();
7: context.fill();
(note that while we used hex color codes in earlier examples, you can also use named colors for the fillStyle and strokeStyle properties)
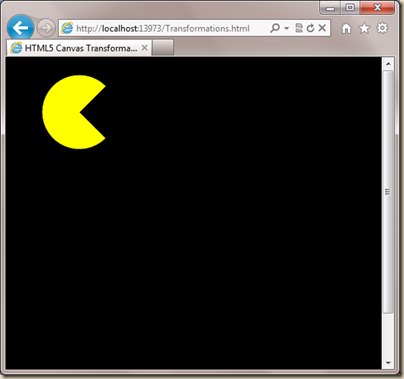
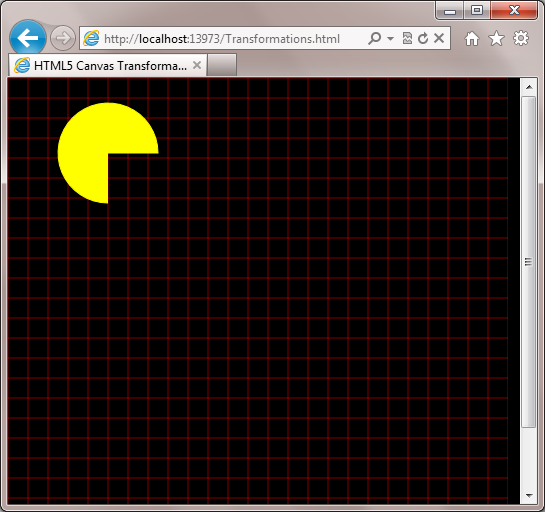
The above code, used with our template, results in the following output:
Now let’s say we want to rotate what we’ve drawn by 45 degrees. Canvas exposes a rotate function for just this purpose, and it accepts one argument, which is the angle, in radians, for the rotation. We can get the radians by multiplying degrees by PI/180, so 45*PI/180 = 0.79 (rounded). If we want an exact number, we can simply send the entire equation as the argument, like so:
context.rotate(45*Math.PI/180);
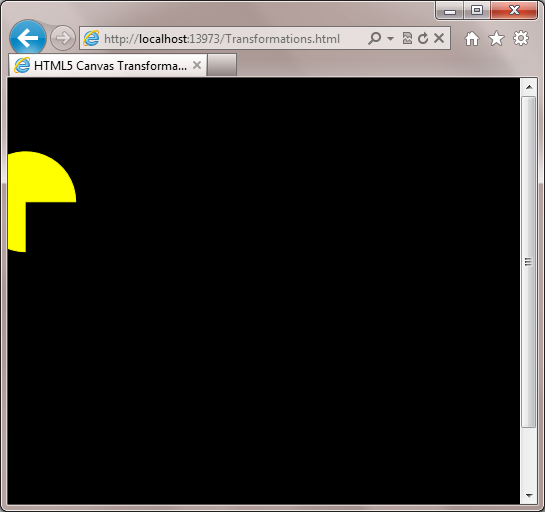
You might assume that adding this before the previous code would give the desired result. You’d be wrong. Here’s what we end up with if we insert the call to rotate before calling beginPath:
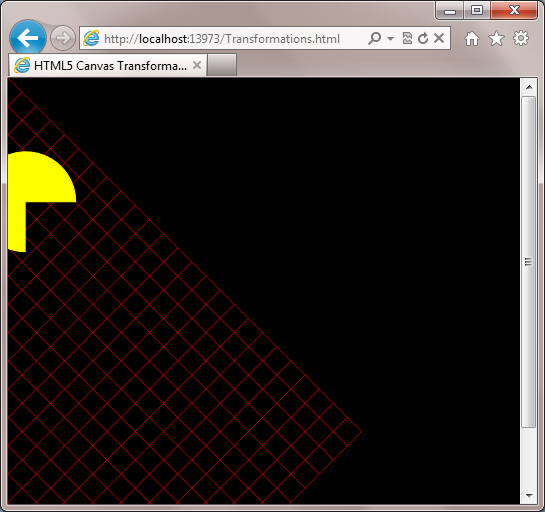
Woah! Clearly that wasn’t quite what we had in mind. We seem to have both rotated and translated (i.e. moved) our shape. Well, not really. In fact, this highlights one of the challenges of Canvas transformations, namely that we’re not transforming our shape, we’re transforming the entire canvas. In calling the rotate function, we’ve rotated the entire coordinate system for our canvas with the center of rotation being the 0, 0 point of the canvas (top left) which results in the shape being drawn at the angle desired, but in a different location. D’oh!
To better illustrate what’s happening, we can draw some gridlines before we draw our shape:
1: function renderGrid(gridPixelSize, color)
2: {
3: context.save();
4: context.lineWidth = 0.5;
5: context.strokeStyle = color;
6:
7: // horizontal grid lines
8: for(var i = 0; i <= canvas.height; i = i + gridPixelSize)
9: {
10: context.beginPath();
11: context.moveTo(0, i);
12: context.lineTo(canvas.width, i);
13: context.closePath();
14: context.stroke();
15: }
16:
17: // vertical grid lines
18: for(var j = 0; j <= canvas.width; j = j + gridPixelSize)
19: {
20: context.beginPath();
21: context.moveTo(j, 0);
22: context.lineTo(j, canvas.height);
23: context.closePath();
24: context.stroke();
25: }
26:
27: context.restore();
28: }
The code above simply renders a grid of the specified size and color to the canvas. We can call it from our rendering code like so:
1: context.rotate(45*Math.PI/180);
2: renderGrid(20, "red")
3: context.beginPath();
4: context.fillStyle = "Yellow";
5: context.strokeStyle = "Yellow";
6: context.arc(100,75,50,0.25*Math.PI,1.75*Math.PI);
7: context.lineTo(100, 75);
8: context.stroke();
9: context.fill();
The result should make it a little clearer what’s going on with our Canvas transformations:
* * *
Saving and Restoring the Current Context
You might have noticed in the renderGrid function calls to the save and restore functions on the context object. These functions do pretty much exactly what they sound like, save the current context and restore it, so that you can apply style and transformation changes to the context and still be able to get back to where you started. Without saving and restoring the context, any transformations applied are cumulative, and you could quickly reach a point at where it would literally be impossible to figure out which way is up. One point to keep in mind is that the Canvas save state is stack-based. So if you call context.save() twice, you now have two 2d context states saved on the stack. When you call context.restore(), the most recently saved state will be applied to the context object. Calling context.restore() again would apply the first saved state to the context object, and the stack would be empty.
Now that it’s hopefully clearer why we ended up with the result we did, we might want to figure out how to compensate for this before moving on to other transformations. Probably the simplest way to go about compensating for a pending rotation transformation is to change the origin by using another available transformation, the translation. Calling context.translate(x, y) moves the origin of your Canvas by the specified amount. So to compensate for the translation inherent in a rotate transformation, we simply need to figure out the center of the shape we are rotating, and translate the Canvas origin by that amount, then translate it back once we’ve done the rotation. Here’s what the code looks like (note that I’ve added a call to context.save at the beginning and to context.restore at the end, so that when we’re done drawing this shape, the context is back to its original state):
1: context.save();
2: context.translate(100, 75);
3: context.rotate(45*Math.PI/180);
4: context.translate(-100, -75);
5: renderGrid(20, "red")
6: context.beginPath();
7: context.fillStyle = "Yellow";
8: context.strokeStyle = "Yellow";
9: context.arc(100,75,50,0.25*Math.PI,1.75*Math.PI);
10: context.lineTo(100, 75);
11: context.stroke();
12: context.fill();
13: context.restore();
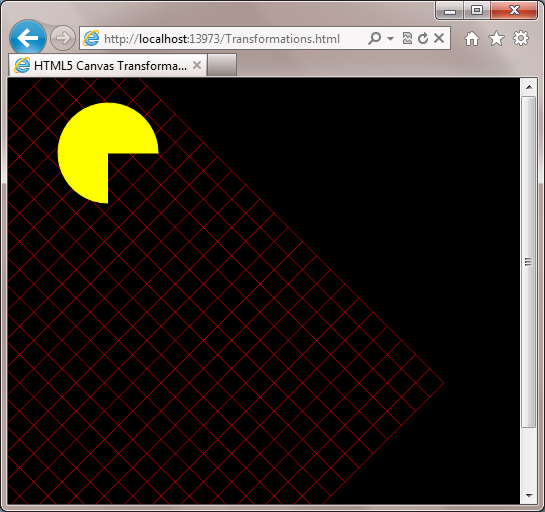
The result is almost, but not quite, right:
Now our shape is rotated 45 degrees as desired, but obviously it wasn’t our desire to rotate our reference grid. Moving the call to renderGrid earlier in the code will do the trick:
1: context.save();
2: renderGrid(20, "red")
3: context.translate(100, 75);
4: context.rotate(45*Math.PI/180);
5: context.translate(-100, -75);
6: context.beginPath();
7: // remaining code omitted for brevity
8: context.restore();
Much better:
So now that we’ve seen the rotate and translate transforms in action, what’s left?
Another useful member of the transformation crew is context.scale(). This function, as you might expect, scales the drawing context. It takes two parameters, the x and y scale factors. If you call context.scale(2, 2) you effectively double the scale of the drawing context in both directions, as shown in the code below:
1: context.save();
2: renderGrid(20, "red")
3: context.scale(2, 2);
4: context.beginPath();
5: context.fillStyle = "Yellow";
6: context.strokeStyle = "Yellow";
7: context.arc(100,75,50,0.25*Math.PI,1.75*Math.PI);
8: context.lineTo(100, 75);
9: context.stroke();
10: context.fill();
11: context.restore();
which results in the following output:
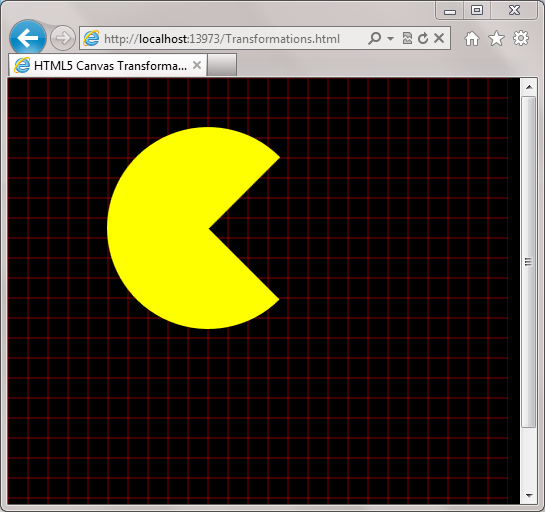
Note that since the call to renderGrid() is made prior to the call to context.scale(), the size of our grid has not changed, while the size of our shape has doubled (note, too, that the distance of the drawn shape from the top left corner of the canvas has also doubled).
I’ve saved the most interesting transformations for last, context.transform(a,b,c,d,e,f), and context.setTransform(a,b,c,d,e,f). Each of these functions accept 6 parameters, which represent a matrix by which the drawing context is transformed (more on this in a moment), and each allows you to scale, rotate, translate, and skew the drawing context with a single API call. That’s a lot of power packed into one function call! The major difference between transform and setTransform is that the latter clears any existing transformations prior to applying the parameters passed to it.
The transformation matrix can be visualized like this:
| a = ScaleX |
| d = ScaleY |
Looking at the parameters that make up the transformation matrix you might ask yourself, “how can I rotate the drawing context using this function when there aren’t any rotate parameters?” Well, it turns out that if you skew the X and Y values the same amount, but skew one in the negative direction, the result is effectively a rotation. So let’s take our shape after the rotate example above, and skew it with the transform function:
1: context.save();
2: renderGrid(20, "red")
3: context.translate(100, 75);
4: context.rotate(45*Math.PI/180);
5: context.translate(-100, -75);
6: context.transform(1, 0, 1, 1, 0, 0);
7: context.beginPath();
8: // Drawing code omitted for brevity
9: context.restore();
this gives us the following output:
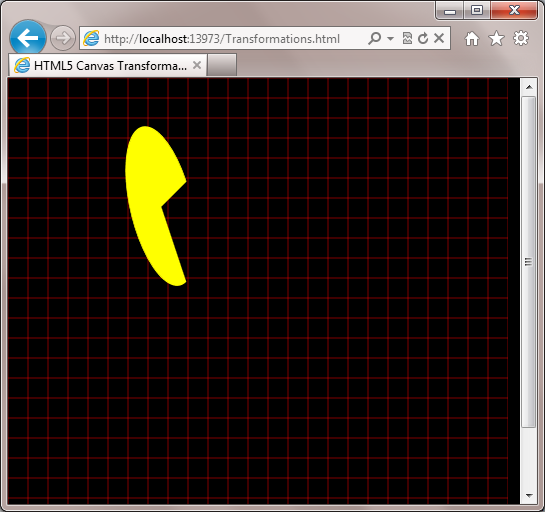
Notice that although we applied a skew of 1 in the +Y direction, that’s not the way our skew appears to be being applied. The reason for this is that the transform function simply applies our transformation matrix to any existing transforms previously applied to the drawing context. Because our rotate transform is still in effect, “Y” is effectively 45 degrees turned from what we’d normally expect to see. If instead we call setTransform with the exact same parameters, the output will look like the following:
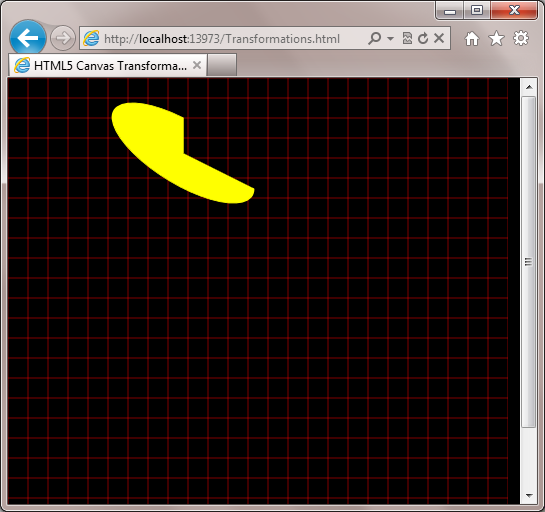
Because setTransform removes any existing transforms, the skew now does what you might have originally expected. So while the simpler APIs of translate, rotate, and scale are great when you need a simple API for transformations, some time spent playing with the transform and setTransform functions will be of great benefit in maximizing your drawing flexibility.
Here’s a JsFiddle with the code from this post, if you want to play with the APIs:
Summary
The HTML5 Canvas element provides some very powerful APIs for transforming the drawing context. Those coming to HTML5 from other technologies like SVG and Silverlight may need to get used to the way that transformations are applied, since they’re a bit different than in those technologies, but with a little practice, you’ll be applying transformations like a pro.
If you found this useful, why not tell your friends? You can also subscribe to my RSS feed, and follow me on twitter for more frequent updates.
More parts in the series:
- Part 1 – Introduction
- Part 2 – Basic Shapes
- Part 3 – Paths and Text
- Part 4 – Transformations (this post)
- Part 5 – Basic Animation Up next, I’ll get moving with simple animations…don’t miss it!
- Part 4 – Transformations (this post)
- Part 3 – Paths and Text
- Part 2 – Basic Shapes
