In previous installments of this series, I’ve shown how you can quickly create REST-based services accessible via HTTP that allow you to easily store and retrieve data in a Windows Store app, using several different approaches including WCF Data Services, ASP.NET Web API, and the new Windows Azure Mobile Services. You can read all of the previous parts of the series here. I recommend reading the intro post at a minimum, so you’re familiar with the games I’m using to demonstrate the concepts in the series.
Notifications – Advantage: Windows Azure Mobile Services
As I noted in my most recent post in this series, there are a couple of features in Windows Azure Mobile Services (hereafter, WAMS or Mobile Services) that make it well-suited for building back-ends for mobile apps (including Windows Store apps), and provide significant advantages in getting your app working quickly, and providing additional needed services. One of these features is built-in support for push notifications.
Before digging deeper into what WAMS provides for notifications, it’s worth taking a moment to explore why my app needs notifications in the first place. In the case of Windows Store apps (and Windows Phone apps as well), the operating system is responsible for the lifecycle of all running apps, and for ensuring that apps do not consume resources such as CPU cycles (and, as importantly, battery life) when they are not in use. An app that is not currently in the foreground and being interacted with by the user may be put into a suspended state, in which the threads and processes of the app are preserved in memory, but during which the app does not receive any CPU cycles. As a result, there is no way for apps that are suspended, or those that are not running at all, to receive information from the outside world. This, of course, includes any back-end service in the cloud that the app may work with to store and retrieve data.
So long as the app always initiates communication, this presents no issues at all. But there may well be scenarios in which changes in data in the cloud need to be communicated to one or more of the client apps. For example, in my game leaderboard service, I might want to check when a new high score record comes in, and see if the new score has ousted the current leader, and notify the leader that they’ve been bested.
The steps I’m following here are roughly based on the Getting Started with Push Notifications tutorial on the Windows Azure site, but modified to work with one of the example games I’ve been showing throughout this series. There are many more good tutorials at the site, and I recommend you check them out.
Types of Notifications
At the time of this writing, WAMS provides support for push notifications for Windows Store apps (both C# and JavaScript apps), Windows Phone 8, and iOS. For Windows Store apps, Mobile Services supports three types of push notifications:
- Tile Notifications – this type of push notification is used to send updates to the Live Tile for the app that is using WAMS as a back-end. Tile notifications can be used for sending text updates, image updates, or both, and there are a wide variety of templates for the layout of the tile notifications, each of which has a corresponding method available in server-side script in the Mobile Service.
-
Toast Notifications – this type of push notification is used to provide transient messages that are relevant to the user. You should not use toast notifications for critical information, since the fact that it is transient means that the user may never see the notification. Like tile notifications, there are a set of templates for toast notifications, each of which has a corresponding method available in server-side script in the Mobile Service.
- Badge Notifications – this type of push notification is used to update the app’s tile with simple status information, such as the number of unread messages for an email app, or to indicate an error condition or attention required from the user.
-
In addition to the notification types above, both Windows Store apps and Mobile Services support the notion of a raw notification, which allows you to send a notification from the Mobile Service that can be received by the app (if running) and processed programmatically in whatever manner you choose.
Configuring Push Notifications for the GameLeader Mobile Service
In the last installment of this series, I showed how to quickly build a back-end service using Mobile Services that could support multiple Windows Store games, providing a simple and straightforward leaderboard service. Now I’m going to add the ability to send push notifications from my service.
The first step in this process is to register my app for the Windows Store, since this is what gives me access to the Windows Notification Service (WNS), which handles the communication from my Mobile Service to the app(s) running on the end users’ machines. In order to register my app, I need to have a valid Windows Store developer account. You can purchase this via an annual subscription, or if you are an MSDN subscriber, your subscription may include a free 1-year developer account as part of the benefits for the subscription, depending on the level of your subscription.
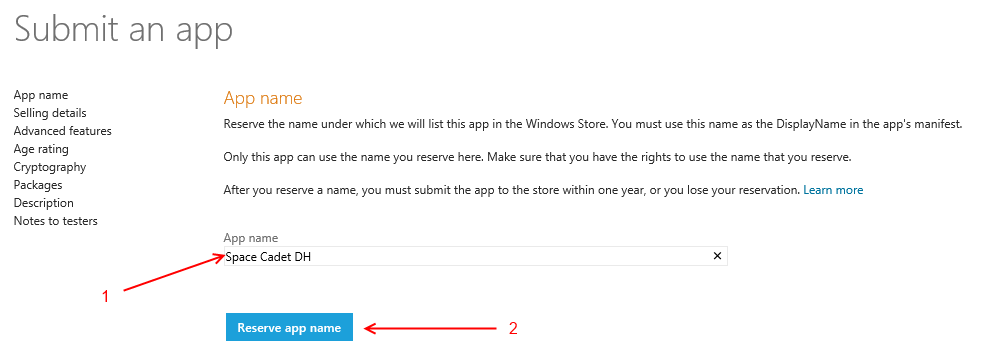
Since I’ve already got my account, I just head over to the Submit an app page, log in, and then click on the first item in the list to set the app name. I’ll use Space Cadet, one of the games I’m using as an example. Note that I’m appending DH so the name is unique to my example game, since I’m using the Space Cadet code from my peer David Isbitski for the example (app names for the Windows Store are unique, and once you’ve reserved a name, no one else can use that name…you must publish your app within one year of reserving an app name, or the name reservation will be released):
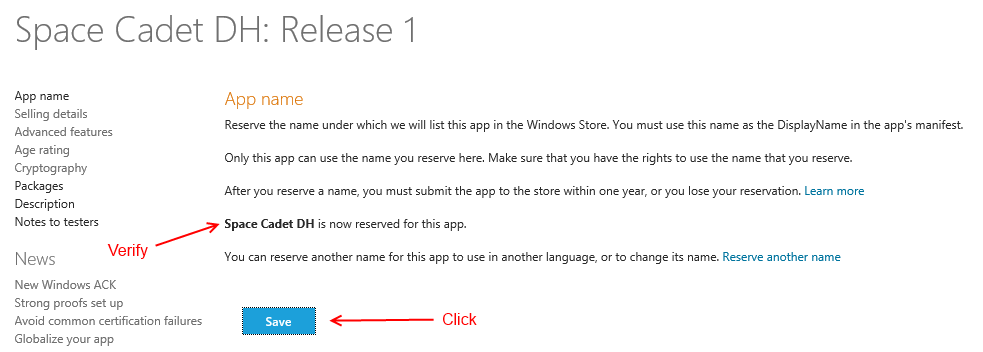
If the reservation is successful, I see the following:
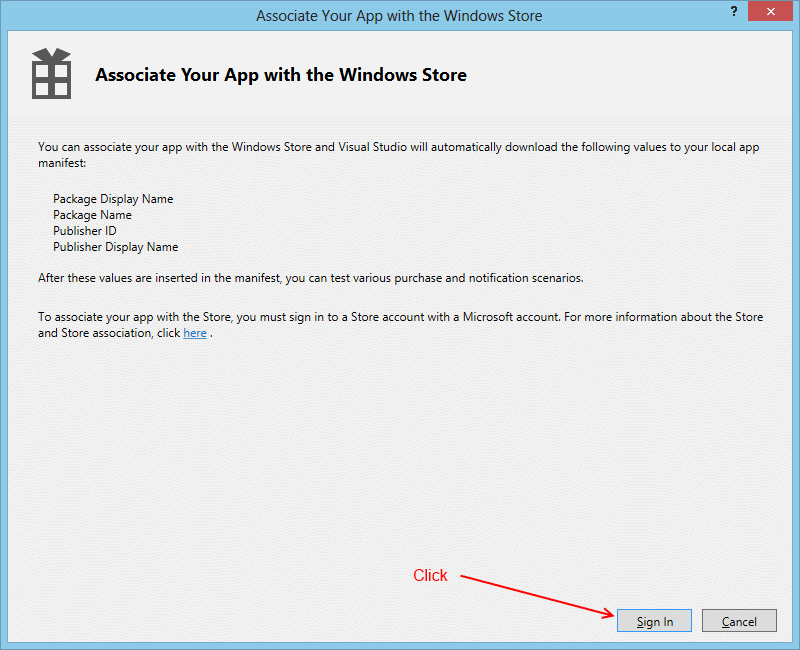
Next, I need to associate my Space Cadet app project with my Windows Store entry. To do this, I use the Store menu in Visual Studio (note that the Store menu is a top-level menu in some editions of Visual Studio 2012, and in others, it’s a submenu of the Project menu) and select the menu option Associate App with the Store…, which gives me the following dialog:
I click Sign In, and provide the Microsoft Account credentials associated with my Windows Store account.
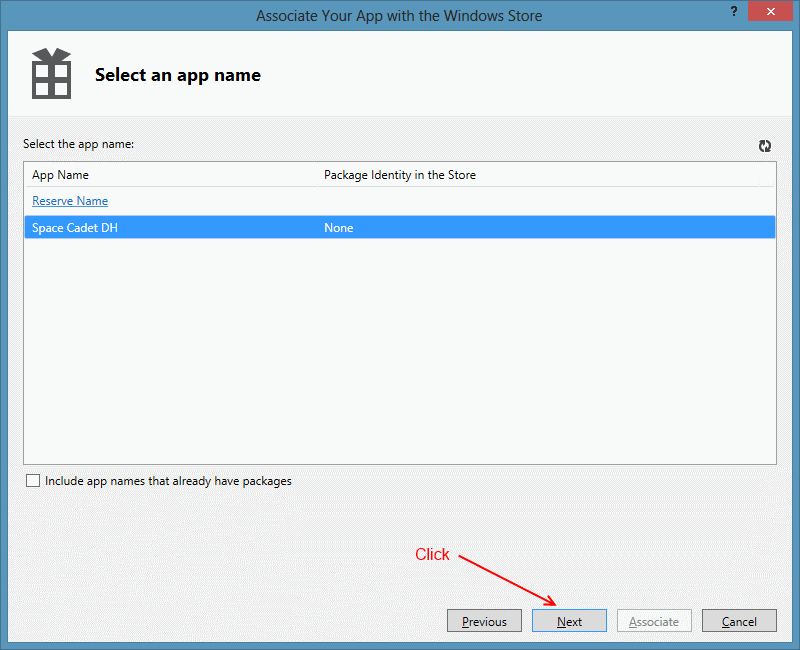
After selecting the app, as shown above, I click Next.
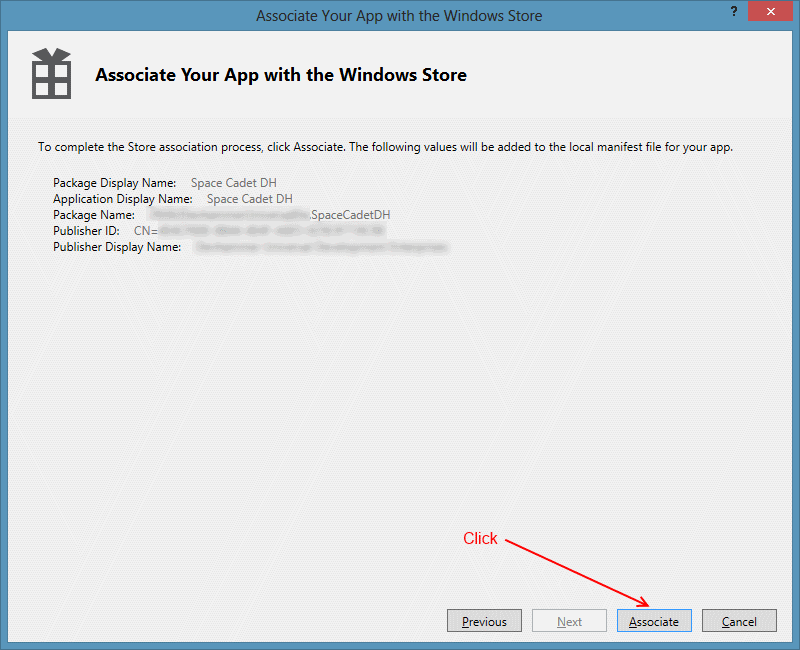
I’m presented with a summary of the information that will be added to the manifest file for my app, and since it looks good, I’ll click Associate to finalize the process.
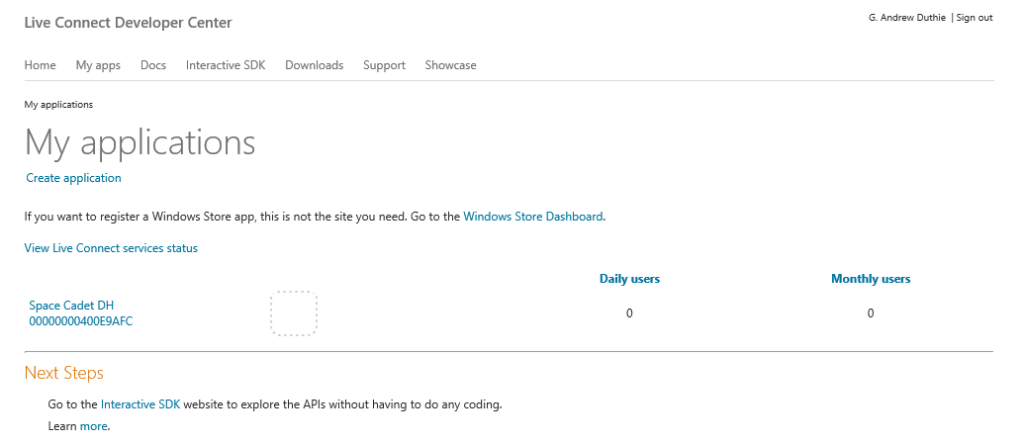
Now that I’ve got my app associated with the Windows Store listing, it’s time to head over to the Live Connect Developer Center, and click on the My apps link at the top of the page. I’m greeted by a list of the applications that are associated with my account, which conveniently includes the app I just associated:
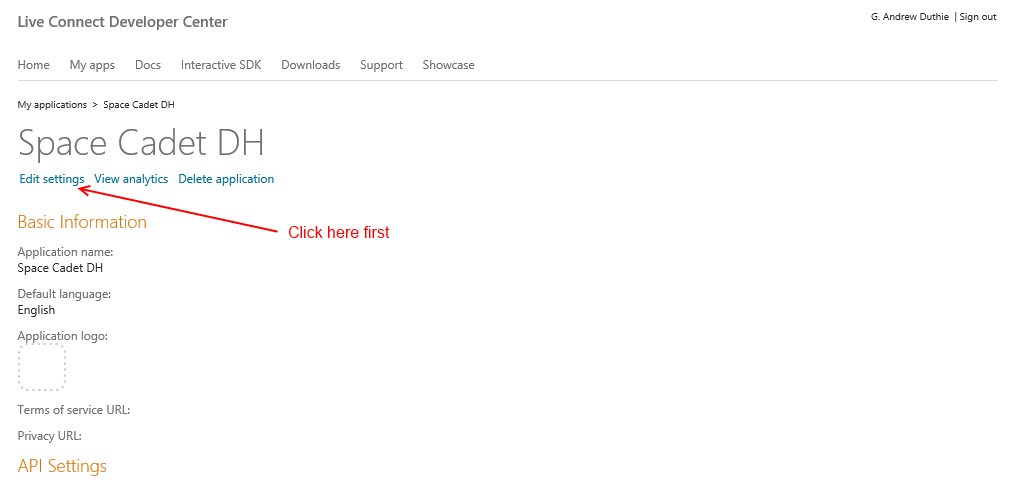
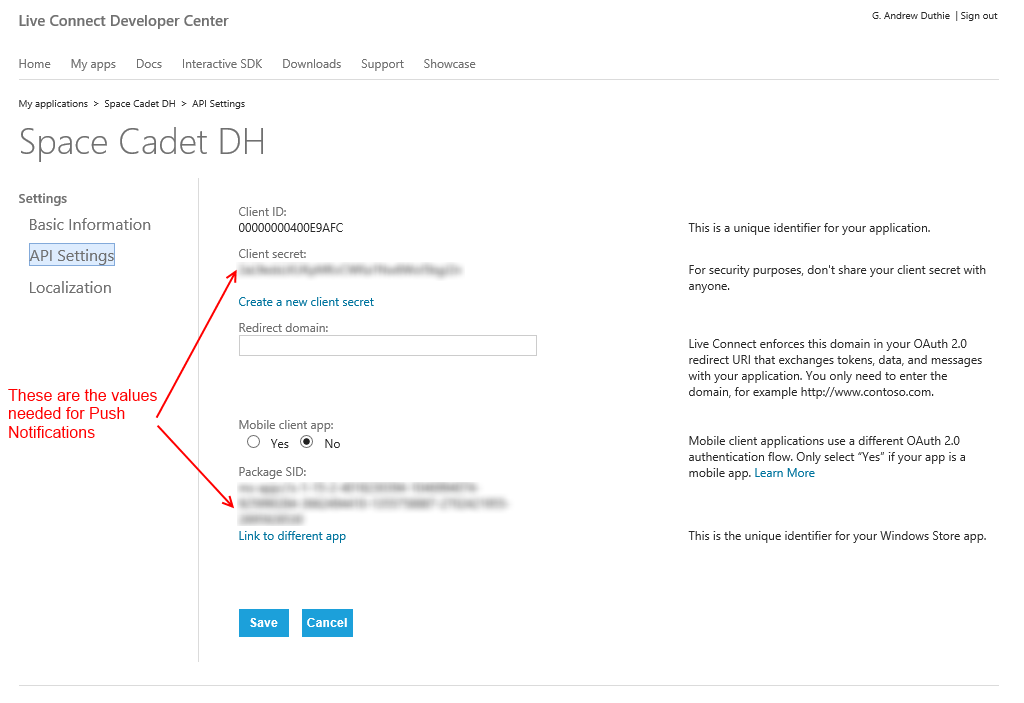
The Live Connect Developer Center provides access to a number of important aspects of my app, and in the context of push notifications, the most important of these are the Client ID and Client secret, which may be obtained by clicking on the name of the app:
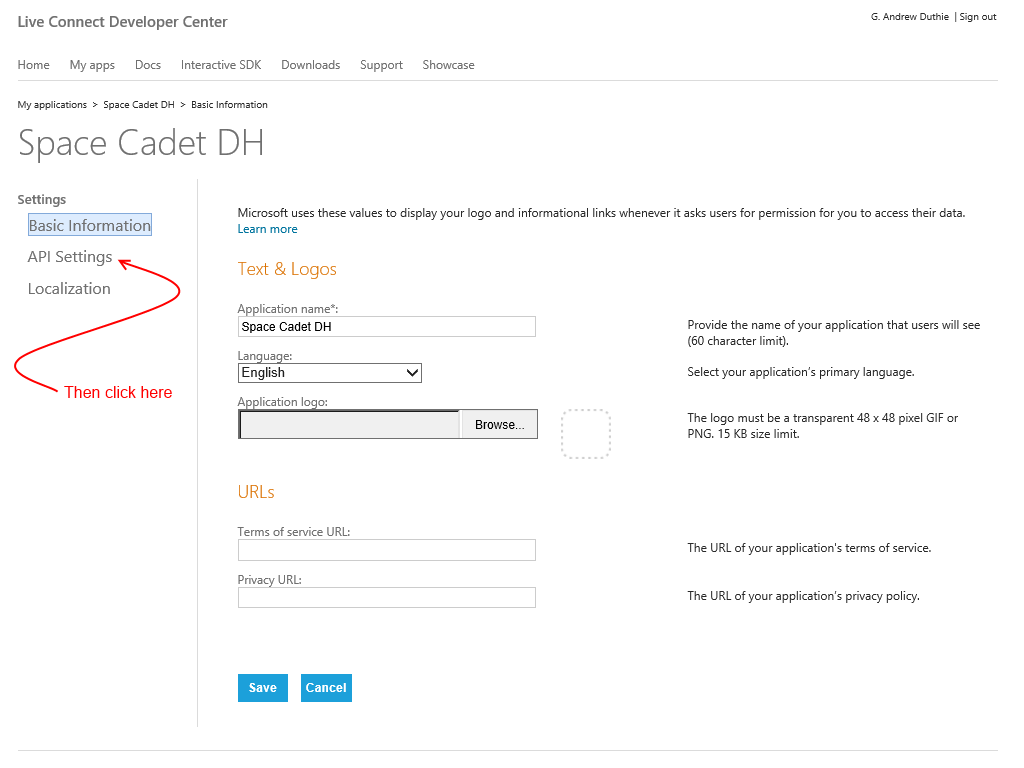
then clicking on API Settings:
which gets me to the information I need, which is the Package Security Identifier (or Package SID for short) and the Client Secret:
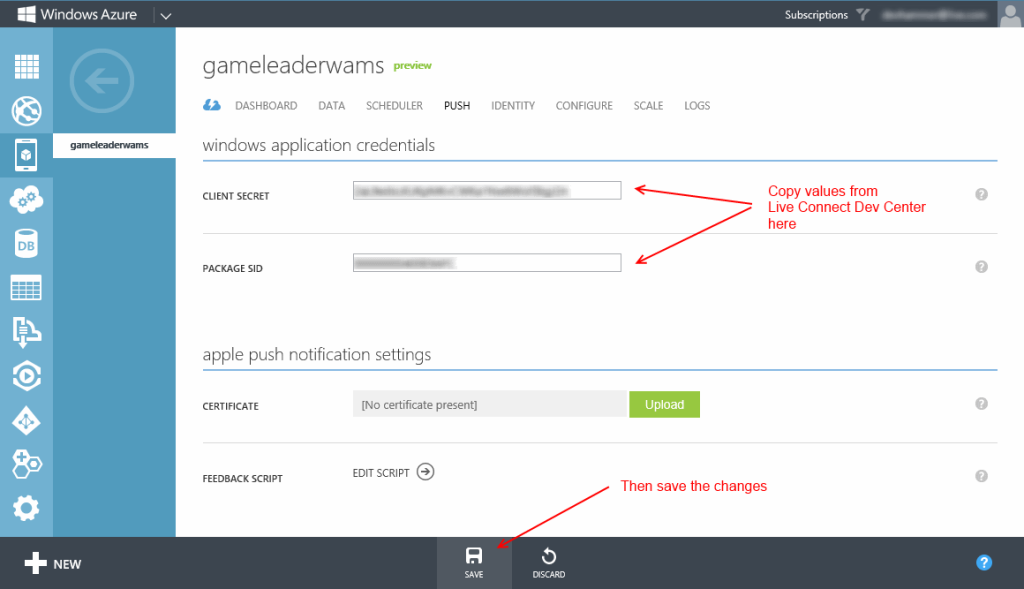
Once I’ve made note of the above values (which, BTW, you should keep secret, as they are a type of security credential for your app), I’ll head over to the Windows Azure Management Portal, sign into my account, and then go to my existing Mobile Service, and select the Push tab. As the image below shows, there are fields here for the Package SID and the Client Secret, so I’ll copy the appropriate values into these fields, and click the Save button:
With that, the configuration for my app is complete.
Adding Push Notifications
Next, I’ll add the code to my game to enable push notifications. This comes in two parts…in the first part, I’ll add code that will ask the Windows Notification Service for a channel with which to send push notifications for that particular instance of my app. In the second part, I’ll add some server-side script to actually send the notification.
I’m going to start by opening up the leaderboardWAMS.js file that contains all the logic for connecting to my leaderboard mobile service (you can review the code in the previous post in this series), adding a variable named channel to the variable declarations at the top, and then adding the following code just before the call that initializes the mobile service client:
1: // Get the channel for the application.
2: var channelOperation = Windows.Networking.PushNotifications
3: .PushNotificationChannelManager
4: .createPushNotificationChannelForApplicationAsync()
5: .then(function (newChannel) {
6: channel = newChannel;
7: });
This code will retrieve the channel information from WNS and store it in the channel variable, which we’ll use later. It’s important to note that if I wanted my code to be robust, I’d want to check for network connectivity before making this call, as well as add appropriate exception handling.
Next, I’ll update the updateHighScore function to add the current channel URI to the GameScores table in my mobile service, like so:
1: function updateHighScore(newScore) {
2: var scorePromise = getCurrentPlayerScore();
3: scorePromise.done(function (currentScore) {
4: if (currentScore.score <= newScore) {
5: currentScore.score = newScore;
6: // add channel info
7: currentScore.channel = channel.uri;
8: gameScoresTable.update(currentScore).done(function () {
9: showMessage("Leaderboard Updated.");
10: });
11: }
12: }, function (e) {
13: showMessage(e.message);
14: });
15: }
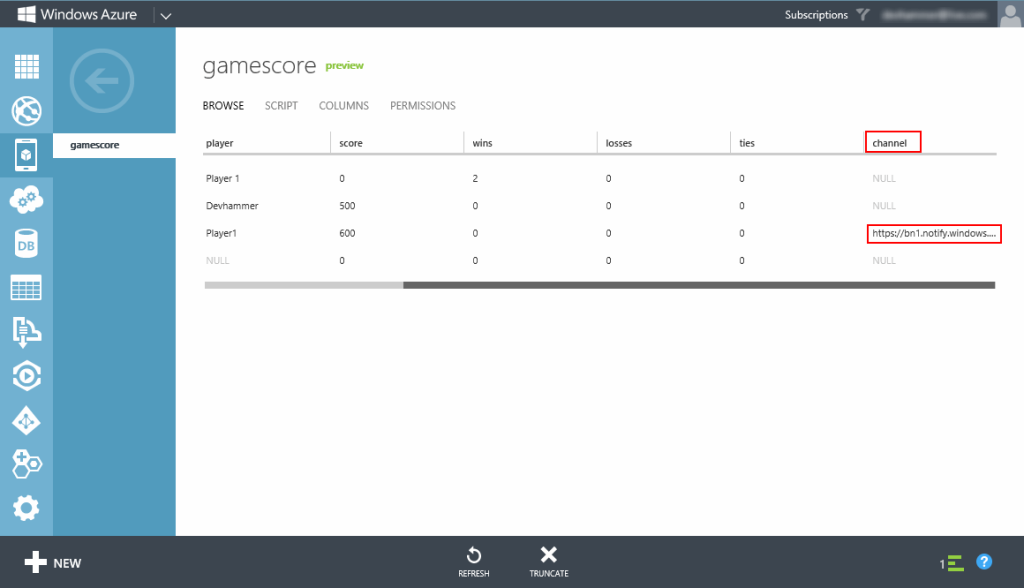
Thanks to the dynamic schema capability in Windows Azure Mobile Services, the first time that I save a new high score, the GameScore table schema will automatically be updated to include the new channel column, and the current channel URI will be stored, as shown below:
With the channel now available when an item is updated, I can add some simple code in the mobile service to send a tile notification. First, I’ll click the Script tab in the management portal, which gives me access to the insert, update, delete, and read operations. I’ll select the update operation, and modify the script like so:
1: function update(item, user, request) {
2: request.execute({
3: success: function() {
4: // Write to the response and then send the notification in the background
5: request.respond();
6: push.wns.sendTileSquareBlock(item.channel, {
7: text1: item.score,
8: text2: "New High Score!"
9: }, {
10: success: function(pushResponse) {
11: console.log("Sent push:", pushResponse);
12: }
13: });
14: }
15: });
16: }
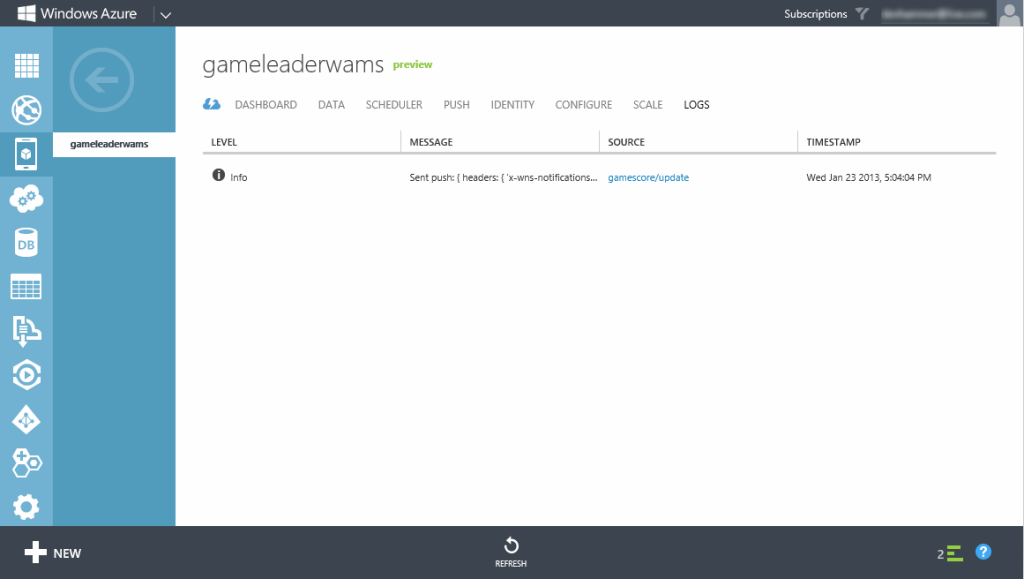
When an item is updated, the code in the update function receives the item being updated (along with some additional arguments). The script then executes the request, which will update the underlying data, and if this is successful, will use the push object to send a TileSquareBlock tile update, passing in the new high score for that player, and the text “New High Score!”. If the push notification was sent successfully, the response is logged to the mobile service console object, which you can see by selecting the Logs tab at the root of your mobile service in the management portal, as shown below:
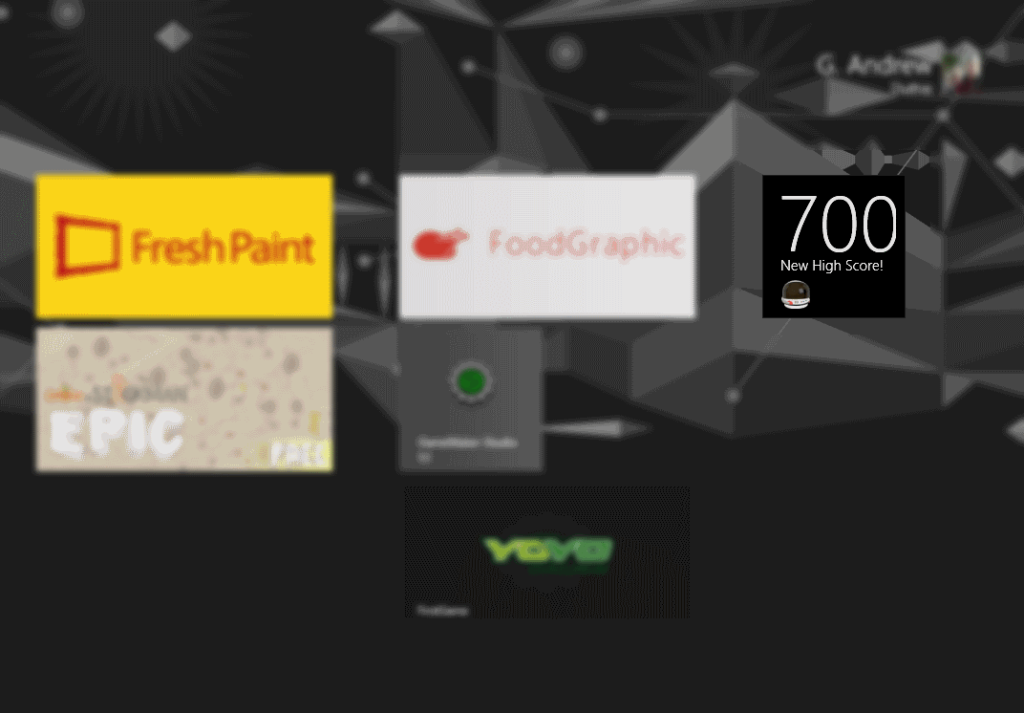
And, of course, if the tile update was successful, the game’s tile on the Start screen should update as well, which it does:
Wrap-up
In this post, I’ve shown you a very simple example of how I can easily leverage Windows Azure Mobile Services’ support for push notifications to send a tile update to users of the Space Cadet game with their most recent high score. Other scenarios are possible as well, including using server-side queries to see whether my new high score has topped someone else’s, and sending that person a push notification that their score’s been beaten.
My colleague Brian Hitney has written a number of useful blog posts with additional details on sending notifications and more from Windows Azure Mobile Services, including the following:
- Best Practice for Sending Windows 8 Tiles from Mobile Services
- Calling Stored Procedures from Windows Azure Mobile Services
-
Scrubbing UserId in Windows Azure Mobile Services
I also strongly recommend going through the mobile service tutorials on the Windows Azure website, which includes a couple of tutorials on push notifications (including the one I based this post on).
It’s important to note that while this post demonstrated using push notifications with a Windows Store app, Windows Azure Mobile Services also supports push notifications for both Windows Phone 8 and iOS as well, so by creating your back-end on mobile services, you can support a variety of platforms.
For Review
If you haven’t already, I highly recommend that you read the rest of the posts in this series:
- Building Data and Services for Windows 8 Apps: Overview
- Building Back-end Data and Services for Windows 8 Apps: OData – Part 1
- Building Back-end Data and Services for Windows 8 Apps: OData – Part 2
- Building Back-end Data and Services for Windows 8 Apps: ASP.NET Web API
- Building Back-end Data and Services for Windows 8 Apps: Windows Azure Mobile Services
-
Building Back-end Data and Services for Windows 8 Apps: Adding Push Notifications (this post)
What’s Next?
In the next installment of this series, I’ll explore adding authentication to my leaderboard service, using Windows Azure Mobile Services. I’m also working on a series of episodes of Microsoft DevRadio in which I’ll be discussing the concepts of this series, and doing some demos, with my colleagues Brian Hitney and Peter Laudati. I’ll post links to the shows once they’re available.
While you’re waiting for the next installment, why not sign up for Generation App? There are lots of great resources available for building Windows 8 apps (and now for Windows Phone 8 as well), including new information on a variety of app frameworks from partners that make it fast and easy to build apps and games for Windows 8. It’s free, and you control how often updates are sent, so there’s no good reason to pass it up. Sign up now!
-
- Building Back-end Data and Services for Windows 8 Apps: Windows Azure Mobile Services
- Building Back-end Data and Services for Windows 8 Apps: ASP.NET Web API
- Building Back-end Data and Services for Windows 8 Apps: OData – Part 2
- Building Back-end Data and Services for Windows 8 Apps: OData – Part 1
-
- Calling Stored Procedures from Windows Azure Mobile Services
