A Lighthearted Look at Adding AI to your Apps
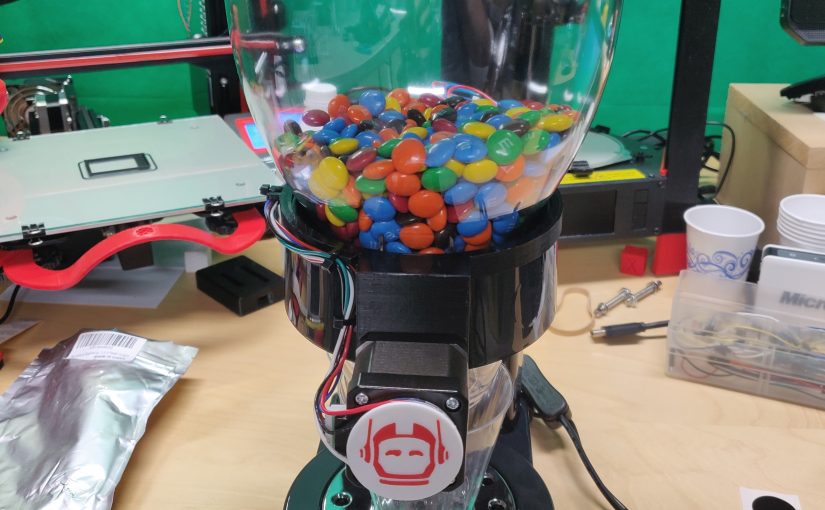
If you’re like my boss, you’ve probably thought to yourself, “what the world needs right now is an AI-driven candy dispenser.” OK, maybe that wasn’t exactly what he was thinking, but that’s where we ended up, when he had the idea to demonstrate the power of AI, using an unconventional demo approach.
To make this work, he purchased a simple mechanical food dispenser, shown in the image below:
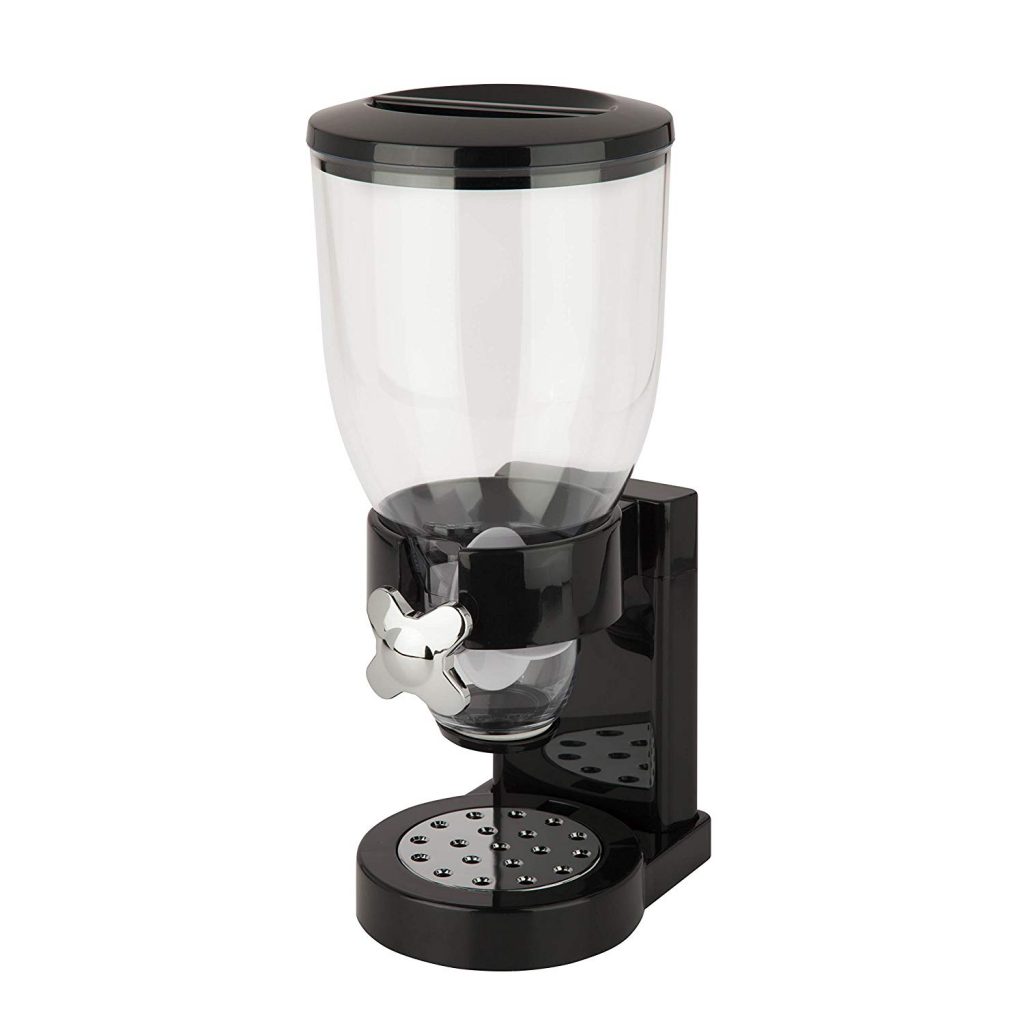
This dispenser had the advantage of being inexpensive, and more importantly, it had a removable handle and shaft, which could be replaced by a stepper motor (which can be moved with precision using a variety of microcontroller boards or a Raspberry Pi), along with some 3D printed parts to mate the motor to the paddle wheel used to dispense the contents. That’s where I came in.
Automating the Dispenser
Before we could demonstrate the power of adding AI to an OutSystems app, we needed the candy dispenser to be controllable and automated. As noted, this involved adding a stepper motor similar to the one below, to control the paddle wheel:

To mate the stepper motor to the dispenser, I designed and printed a shaft adapter, and a bracket. To enable the stepper motor to be controlled by the OutSystems app, I purchased a $20 Particle Photon microcontroller *, which has built-in Wi-Fi support, and is programmable using familiar Arduino code, along with a $5 stepper motor driver, which simplified the programming of the device. Wiring was accomplished using a breadboard and jumper wires, which is pretty common for electronics prototyping. For fun, and to provide a visual indication of when the device receives commands from the app, I added a multicolor LED ring to the device as well.
- An earlier version of the dispenser used a Raspberry Pi and Python code, and was a little more complex. The Particle Photon was both cheaper and easier to use, and also had a built-in SDK that enabled calling functions on the device directly as REST API methods.
I won’t spend a lot of time on the device itself (I’m planning a follow-up post that goes into more detail on the hardware, and the firmware that allows the Candy Dispenser to be addressed via REST APIs), but at the end of the build process, I had a Candy Dispenser that could connect to the internet, and receive commands via REST. There’s a parts list for the dispenser in the description of the YouTube video at the end of this post, for those who are interested.
The Mobile App – Hardware and AI
Once I set up the Candy Dispenser hardware to respond to REST API calls, the next step was to create an OutSystems mobile app to consume these REST APIs, and call them based on inputs from device hardware and AI analysis, for the following use cases:
- NFC for reading text embedded in NFC tags: When the text read from an NFC tag matches the target value in the app settings, dispense candy
- AI Text Analytics for determining the sentiment (positive/negative) in a given text string: If the sentiment is positive, dispense candy.
- AI Emotion Detection, leveraging native camera hardware, and Azure Cognitive Services: Evaluate a picture taken from the device camera to determine the emotion of the person in the picture: If the person is sad or angry, dispense candy.
In each case, if the target criteria for the use case is not met, the app calls a REST API that tells the LED ring on the candy dispenser to display red, which provides an additional indication that the REST call succeeded.
Accessing Native Hardware
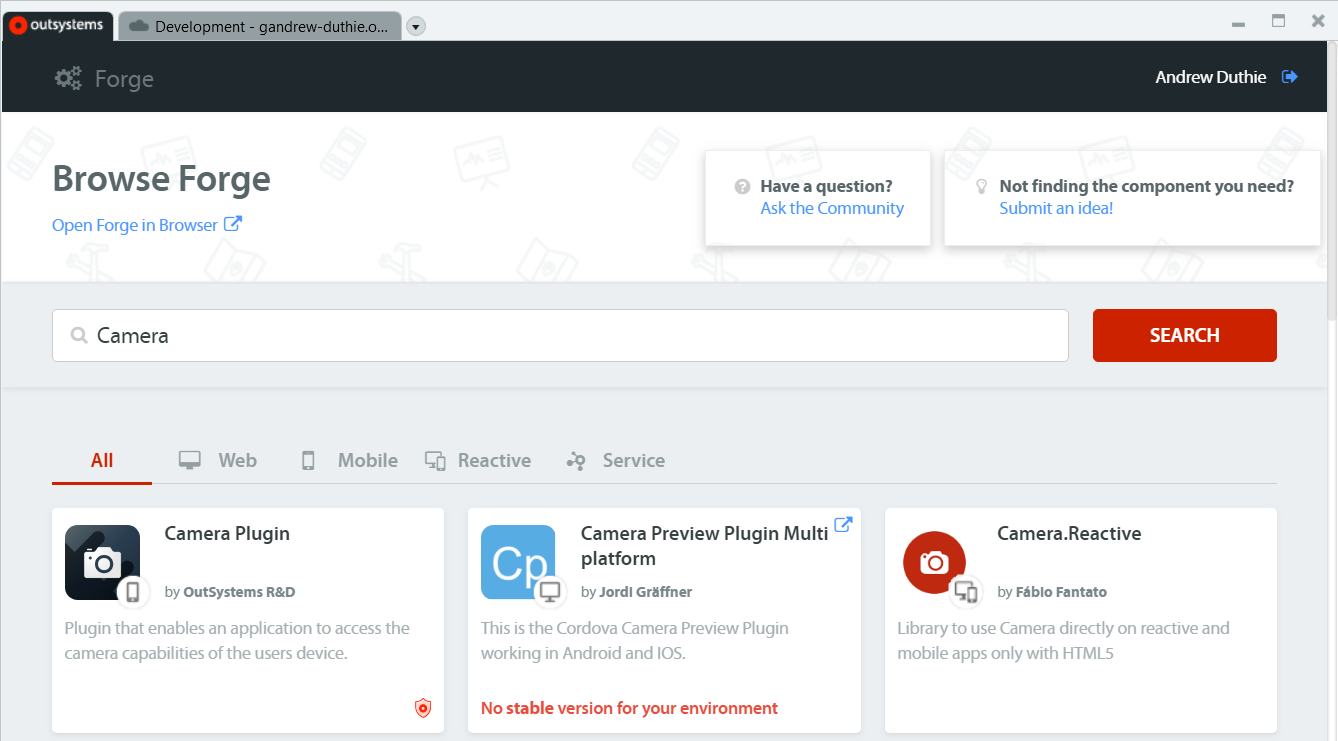
OutSystems mobile apps are built on top of Cordova, so can leverage Cordova plugins to provide native access to device hardware. These plugins are available to developers in the open source Forge library for download and inclusion in their apps. You can find Plugins using the Forge tab in the OutSystems Service Studio development environment, as shown below, or via the Forge website:
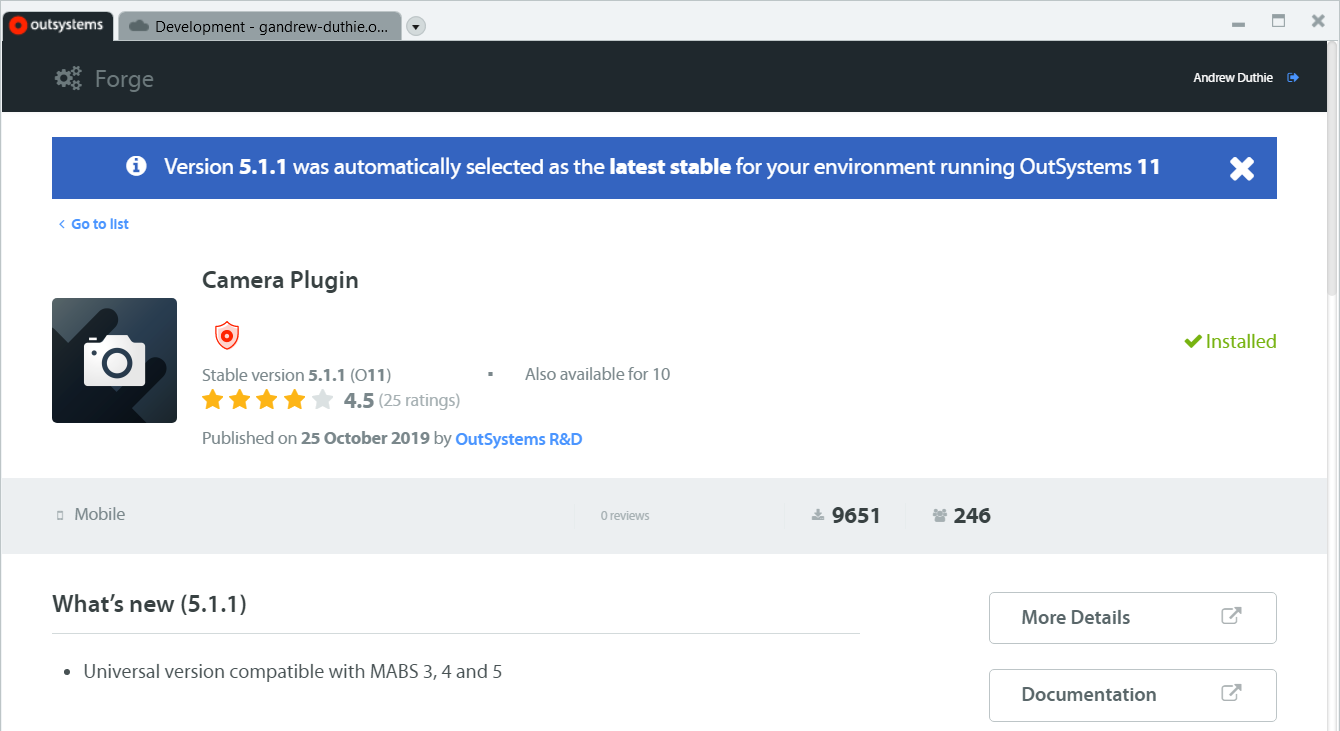
Once you find the plugin you want, you can install it directly from Service Studio, and the plugin is then available for any application in the server environment where it was installed (note that the Camera plugin shown below is already installed…if it was not, an Install button would appear):
After you install the plugins, you can add them to an application using the Manage Dependencies window, accessed by the plug icon on the toolbar, or Ctrl+Q:
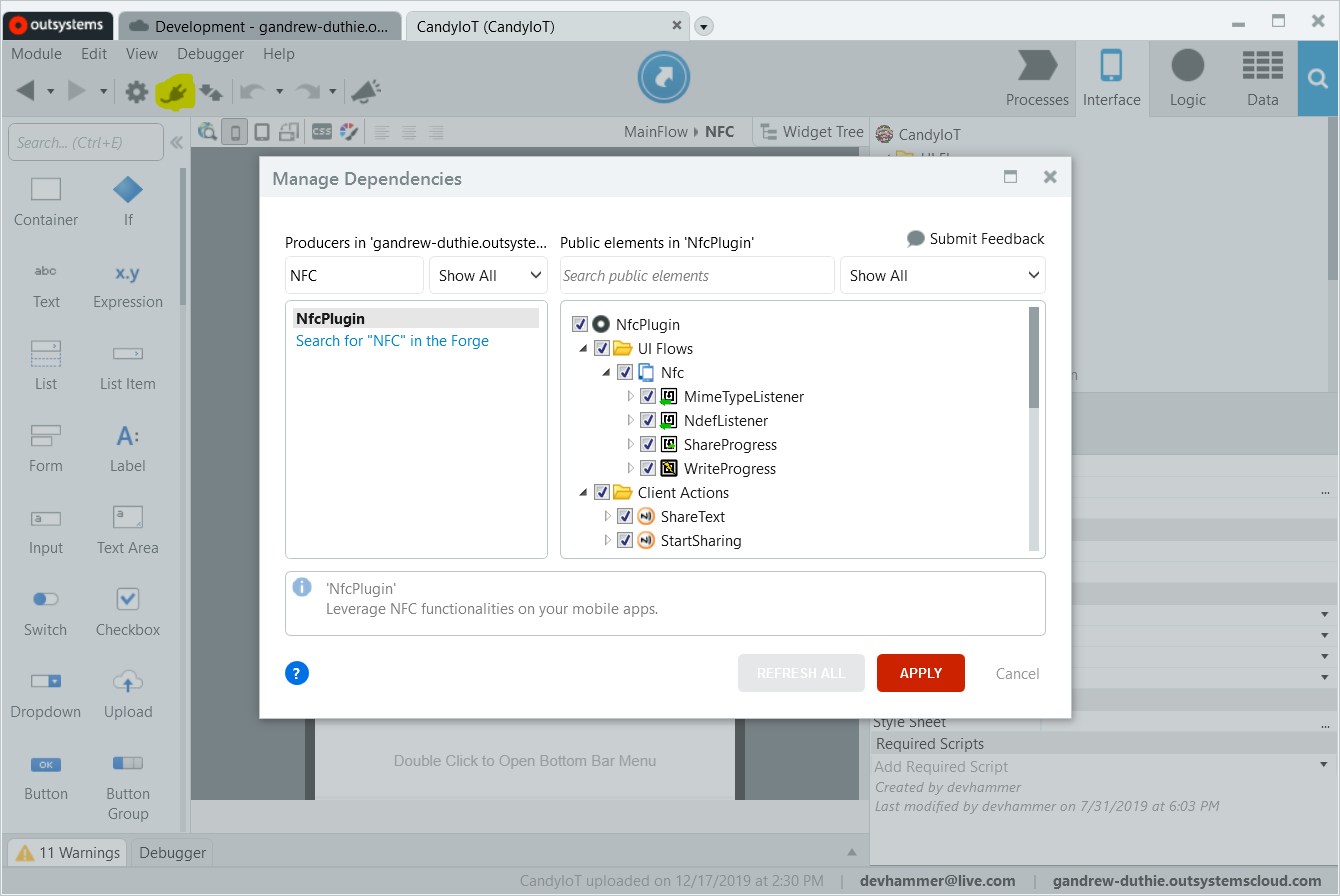
Where the plugin appears after it’s added as a dependency varies based on the functionality provided by the plugin. Most will appear in the Interface tab (for plugins that provide UI-related or screen-related functionality), the Logic tab (for plugins that provide client Actions that can be used in the app), or both.
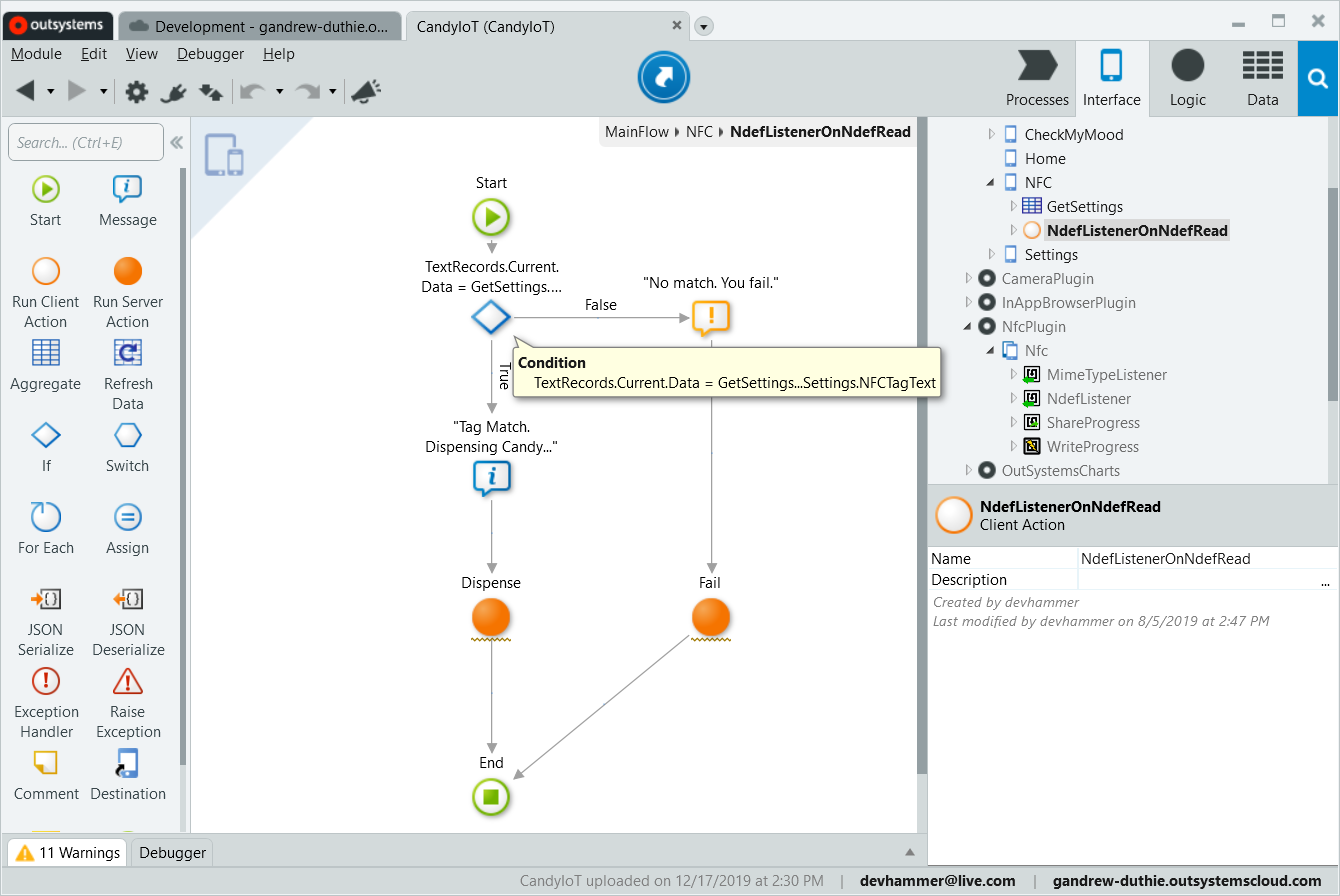
For the NFC functionality, I wanted the app to respond to the reading of an NFC tag, and the plugin provides two options for this, MimeTypeListener and NdefListener. I used the latter, which defines an event that is fired when the NFC radio in the device detects and reads an NFC tag. To respond to the event, I created a client Action that handles the event, and receives a list of the text records stored on the tag. The client Action, shown below, checks the first text record (I’ve made the assumption that there will be only one text record) against an app setting stored in local storage, and if it matches, calls the REST API to tell the Candy Dispenser to dispense candy (technically, the client Action is calling a server Action that wraps the REST API call, but the end result is the same).
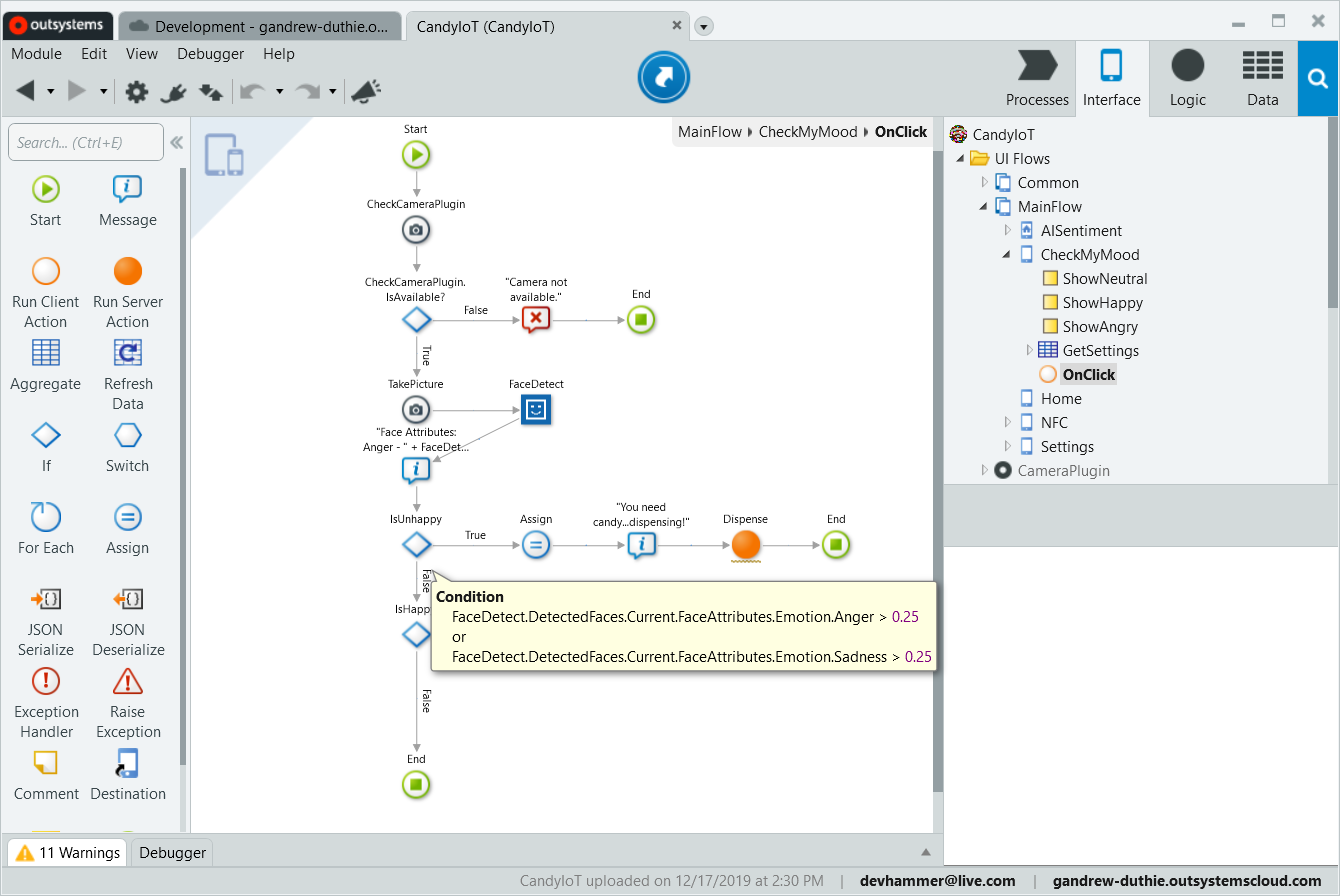
Working with the device Camera is just as easy. In the CheckMyMood screen, I used an Image control to display a neutral face image. I added an OnClick event handler to this image, which is executed when the user taps the image. The client Action checks the status of the Camera plugin, and assuming it’s available, calls the TakePicture Action from the plugin, which I simply dragged into the desired spot in the Action flow. The TakePicture Action only opens the camera UI. No picture is taken unless the user actively chooses to do so. Once the picture is taken, the image data is submitted to Azure Cognitive Services (more on this shortly), which returns an estimate of the emotions displayed in the image. If the emotions indicate sadness or anger, the app tells the dispenser to dispense candy. If not, a message is displayed indicating that happy people don’t need candy.
The OnClick client Action is shown below:
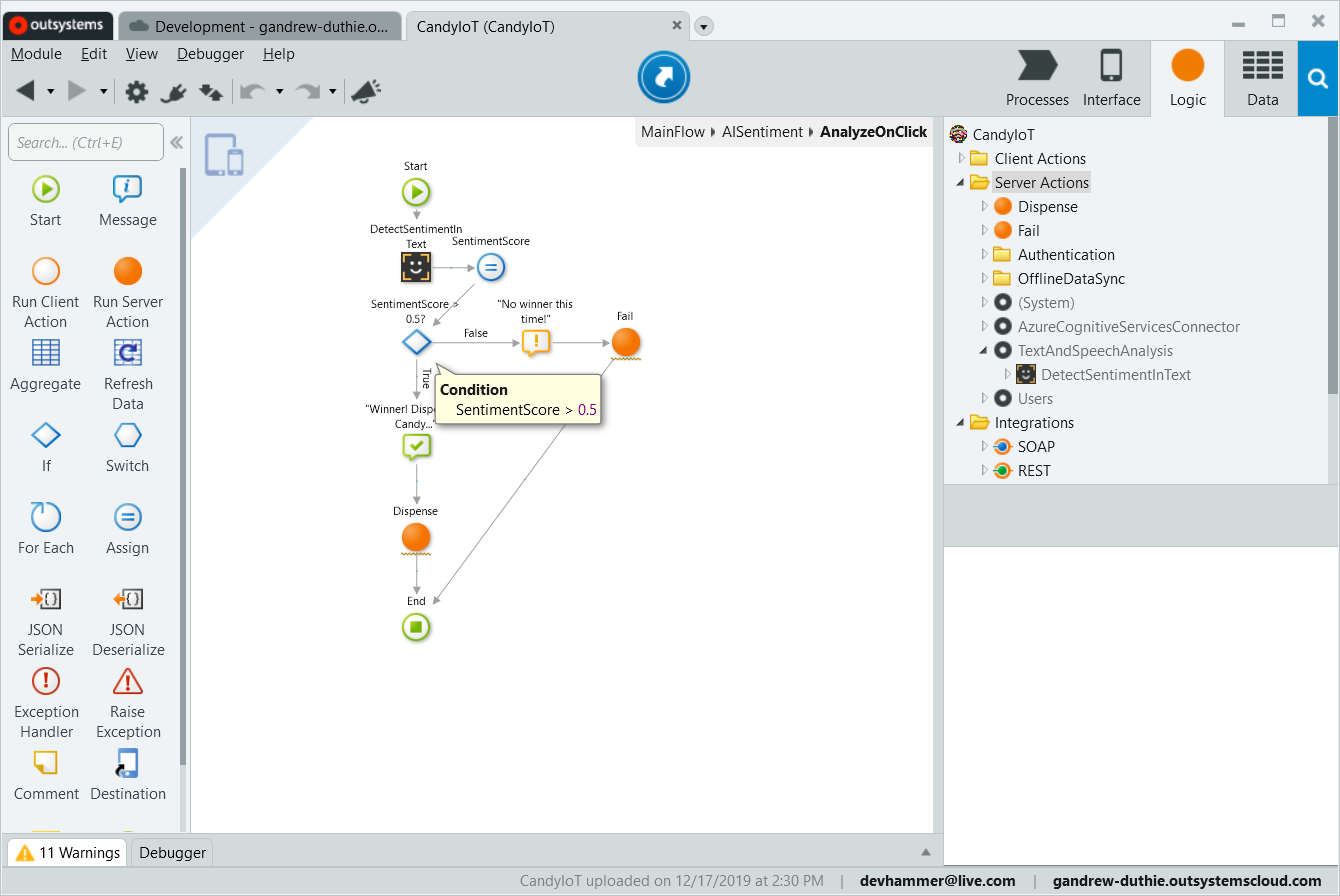
The last use case, analyzing text for sentiment, does not require any device hardware, and simply uses a text box and a button on the screen. The button invokes an action, which submits the text from the text box to the OutSystems.AI Language Analysis plugin’s DetectSentimentInText Action, which again I simply dragged and dropped into the client Action logic flow, as shown below. I arbitrarily chose 0.50 as the breaking point between positive and negative sentiment, and dispense candy for a positive sentiment, and no candy for negative:
AI Integration
Both the emotion detection and sentiment analysis use cases rely on AI to drive the outcome. AI functionality is easy to add to an OutSystems application, leveraging a variety of connectors and components in the OutSystems Forge, including OutSystems.AI Chatbot and OutSystems.AI Language Analysis, as well as Azure Cognitive Services, Azure Bot Framework, Amazon Rekognition, and more.
For the candy dispenser, I installed both the OutSystems.AI Language Analysis component, and the Azure Cognitive Services Connector from the Forge, and added them to my mobile app as dependencies.
Configuring these components is pretty straightforward. You do need to set up an instance of the appropriate Azure service (most offer free plans to start with), and add the subscription key from the service instance to the appropriate site property in Service Center. This process is documented in the following articles:
- Configuring and using OutSystems.AI Language Analysis
- Configuring and using Azure Cognitive Services
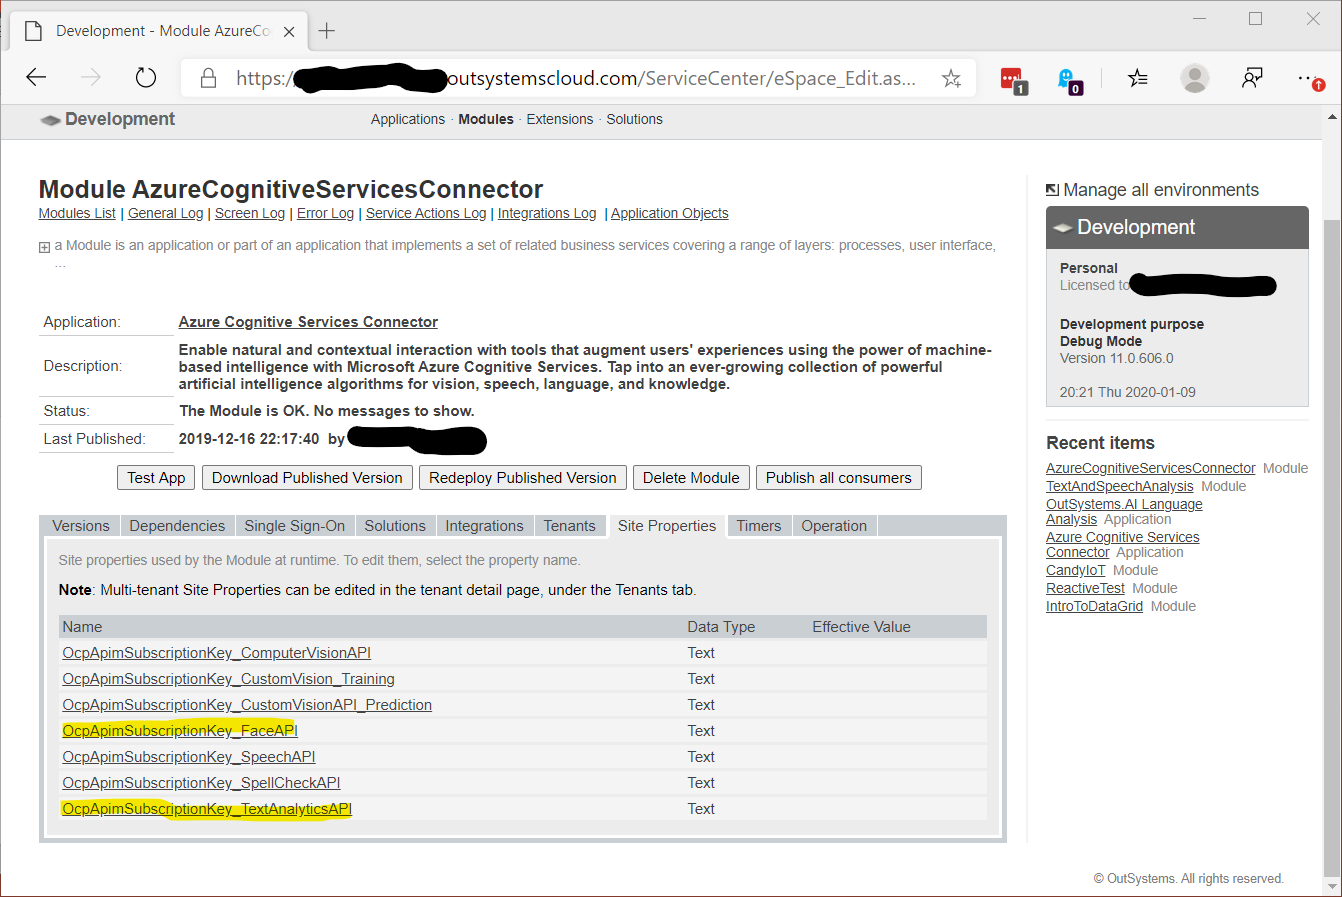
Once the AI service instances have been set up, the last step is to provide the relevant plugins with the necessary information to connect to the AI services, which in the case of the two services I’m using is as simple as adding values to Site Properties representing the API key provided by the relevant service. In my case, I just opened up the AzureCognitiveServicesConnector module (not the Application…Site Properties are configured at the Module level), and set the values for the Face API and Text Analytics API keys, as highlighted below (note that the OutSystems.AI Text Analysis plugin is a wrapper around the Azure Cognitive Services Text Analytics that makes it simpler to use):
With the keys configured, the mobile application is complete, and ready to test. Here’s a video demo of the completed application…Enjoy!
Want to see the Candy Dispenser in action in person? Keep an eye here for upcoming events where I’m showing it off, and watch my Twitter account for announcements as well.